Showing posts with label trapunto. Show all posts

Friday, May 3, 2013

Washing and blocking a quilt


You probably think I've been hiding under a rock for the past month as I haven't been active in blog land but I'm back now and I have a good excuse for my absence.
Remember this old quilt that's been hanging around unfinished for years?  If only I didn't have so many other quilty distractions, sigh.
I've been focusing on a deadline to get this quilt finished and had just over half the trapunto feathers to stuff. Oh boy, that was a big task  finally the day has come to wash and block the quilt before it gets bound. It's a job I don't enjoy but it was better than cleaning my pantry out.
 
I soaked the quilt in the washing machine first to get out all the marking lines. I spun it dry and then washed again in cool water with a wool wash detergent and an abundance of dye catchers.
I laid a flannelette sheet on the rug in the lounge room with the quilt on top. The flannelette works well to hold the quilt in place with minimal movement.
Next step was to square up the middle section containing the rings.
I made sure the diagonal measurements matched and pinned those points
The next step with help from the man of the house was to measure and pin every ring in the middle section and pin as I went. I matched the measurements horizontally and vertically.
After the center was done, it was time to double check that the rings were lined up correctly.
Out came the trusty laser levels. I really must shout myself a right angle tile level.
You can see that I used a large square ruler to get my 90 degrees sorted and lined the edges of the ruler up with the preblocked rings.
 
The next part was to measure my preferred border width from the edge of the rings.
In this case, it's 7 1/2"
Pin, pin, pin and it can stay there until dry which will probably be a day and a bit. I do have a ceiling fan which speeds things up.
When the pins are removed, I'll be marking my cutting lines for the border. I think it's best to do that on the floor while it's all flat.
The next stage will be to bind, sleeve and label. I've named this one Rings And Roses because I couldn't come up with anything better.
I have a nifty trick for the binding part which will be next. I'll lket you know about it next time.
 
Oh and by the way, if  you're at the Sydney quilt show next month, you'll see it hanging out with other quilts.
 
Here's a link to an excellent tutorial with step by step photos for blocking a quilt with borders that I wanted to share with you. You never know when you'll need it.
Quilt Me Happy (click)
 
Until next time, Janet


Monday, May 21, 2012

Loaves and stitches

Thanks to all of you who helped me make a decision regarding which backing to go on my Coxcomb and Currants quilt. It really helped me make up my mind. This is the Windham bird toile that I thought would be good but after thinking about shadowing and other things, I decided it would be better saved for another quilt.
I had trouble getting a suitably off white wide back but ended up with this Moda Muslin in warm white. It's a 200 thread count, a bit of a higher thread count than what I'd prefer for hand quilting but it'll do.
As you can see I have basted the quilt and started some hand quilting. You might have to click the photo to see it better.
This won't be done in a hurry, I'm quilting 1/4 inch straight lines in the background. I have to pace myself since after a few evenings of quilting, I was waking in the night with tingling, numb hands. It's being done in the hoop so there's a lot of wrangling happening when going around the circles.
What else has been going on, well I've had some lovely mail from Sarah over at Kit-Bik Quilts. I won her  awesome giveaway of  lots of yummy fabrics including Liberty lawn scraps, taupe Japanese fabrics and Denyse Schmidt's. Thanks Sarah!!
Skip the rest of the post if you want, it's all about my bread making. Ive been baking a whole heap of bread, mostly sourdough and the starter is going so well that I decided to rename bubbles. What a prissy name anyway. He shall now be called Chuck after Chuck Norris cause he's just as strong.
I've turned into a major bread head and I've started to experiment a bit more. This one is spelt and quinoa flakes. Makes me feel healthy just saying it. The ancient grains are making a big comeback, have you noticed?
I make up my own formulas and recipes now and love this fig and walnut loaf with a bit of honey, wholemeal flour and cinnamon. It's delicious with cheese.
I made two different Tuscan schiaccatas with some dried yeast yesterday.
Buffalo mozzarella, basil and sweet cherry tomatoes. I like it better than pizza.
The seedless grape with raw sugar and olive oil, otherwise known as schiacciata con l'uva.
thanks for visiting, till next time, Janet

Monday, May 7, 2012

I'd love some advice

I finished stuffing all the trapunto on my Coxcomb and currants quilt and spent several evenings carefully trimming the muslin off the back. I couldn't be happier, it's turning out just how I imagined in my mind. Excuse the photo, it had to go on the washing line but you'll get the idea.

I've been mulling over how to proceed for the last week. My dilemma is the backing and I have ordered a red bird toile. Who knows if that's coming, I've had no communication with the online shop to tell me they have enough or if it's been shipped.
Of course it's going to be hand quilted and I want to quilt inside the applique with red and green threads. I thought that if I used a solid off white wide back, it might look ugly with those threads on the back but then again, it would show up the trapunto.
If I use a patterned backing, it wouldn't show up the trapunto. I haven't seen enough antique applique red and green quilts to know what they did in those times but you might.
I would love to hear what your thoughts are. What would you do if this was your quilt?

Sunday, April 8, 2012

Buns and boo boos

I baked my hot cross buns last Thursday all ready for good Friday's breakfast. I made them less spicy this year to suit DH's  but next year I'm going back to more spice.
I don't bother glazing mine, the sticky topping annoys me but we do enjoy them served warm with butter dripping off them or split in half and toasted on the soft side. There's still a few in the freezer, the rest got devoured by family.

As for the sewing, it's amazing how much I can get done with a bit of focus. I'm half way through doing the trapunto on the borders, it's getting exciting.
It's not easy to see the details but if you click on the photo, you'll be able to see the design much better. Ignore the yellow pen marks which will wash out and imagine it looking like white work.

I had a bit of an accident when using the scissors from the back. I snipped right through to the front of the quilt. See that hole? Gasp!
I may have used a swear word, ok, I did. I sat and stared at it for a good while and wracked the brain for a solution.
Step one
I decided to shift the sprig of berries so that the offending hole would be in the middle of one berry
Step 2
Applique a circle of background fabric to that berry. Once it's quilted, who would pick it? It's a good feeling to know how to fix the boo boos. I do know that basted stem is crooked, that will get sorted during quilting.
I hope you're all enjoying your Easter break.

Friday, March 16, 2012

I've had a productive week

I've been enjoying some hand piecing with these snowball blocks inspired by Lizzie. They're so simple to put together  and make for relaxing stitching time in front of the telly. I have six out of eleven rows together without hardly any effort. Of course it would be quicker by machine if that's what you'd prefer. I'm using some perspex templates but there are patterns in some Kaffe Fassett books. I know there's one in his book Simple Shapes Spectacular Quilts
Not all of the fabrics are Kaffes, a lot are from my stash in the cupboard.
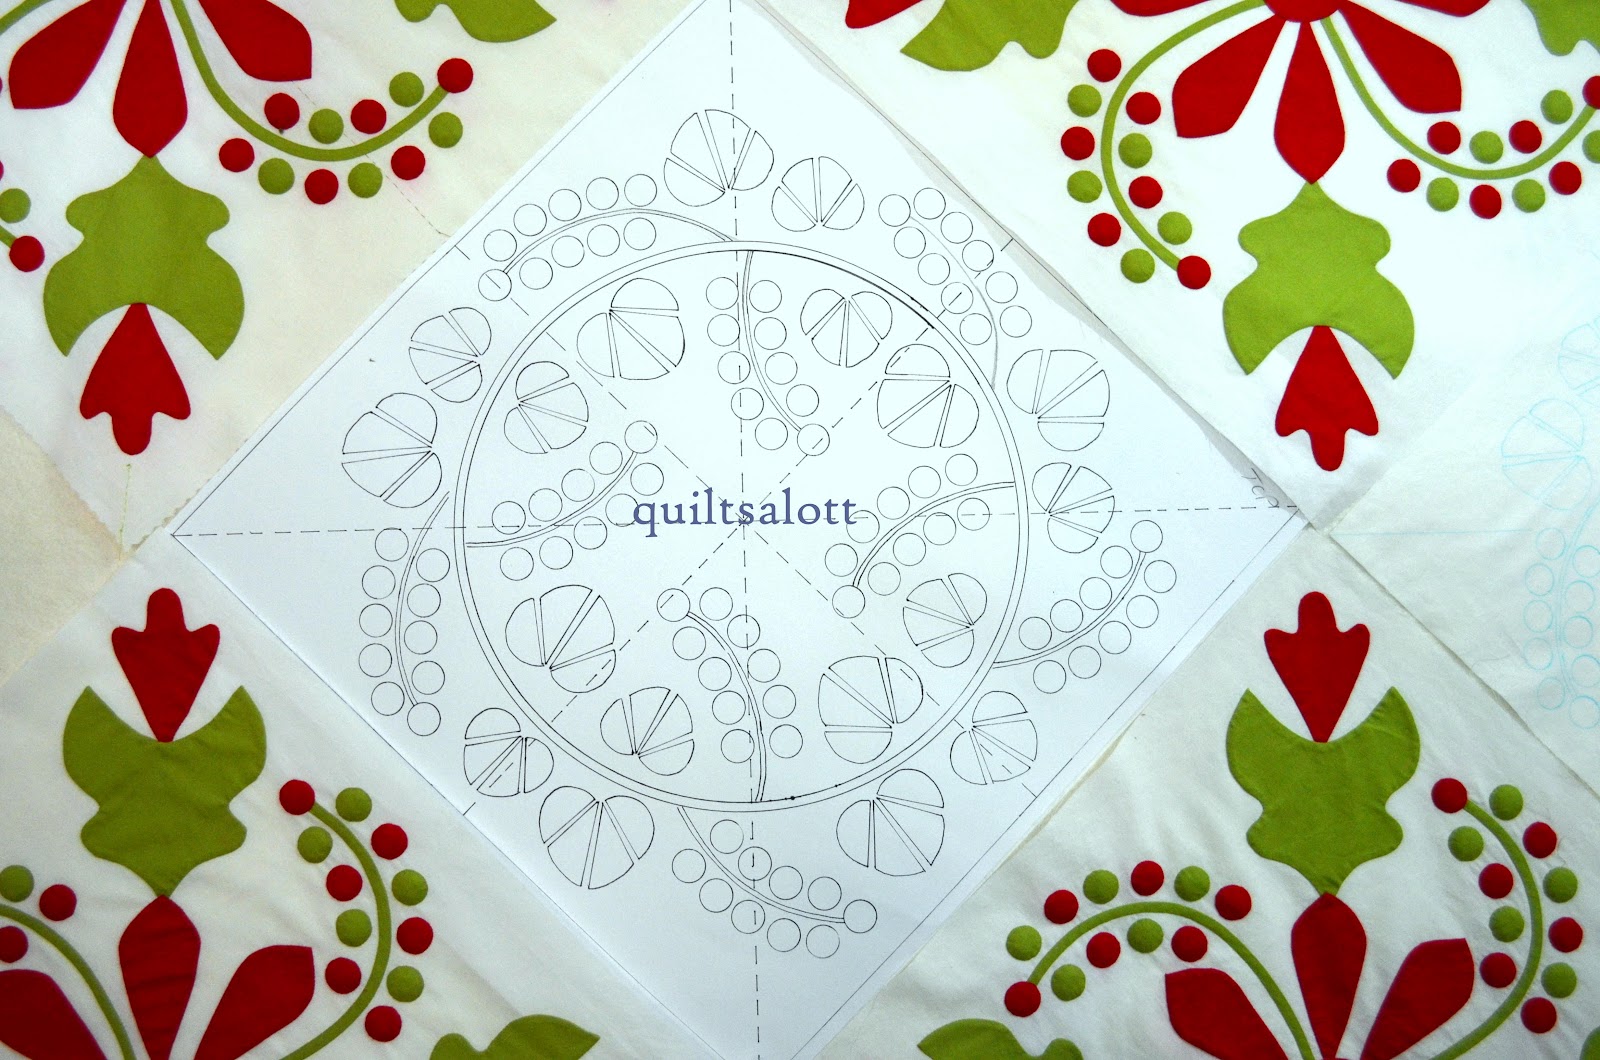
The Coxcomb and Currants quilt is commanding most of my attention at the moment. I spent a good few days drawing out the border pattern for the trapunto and transferring it to the quilt top.


These are the first copies which I did on butter paper so I could see how it would look on the quilt top. Once I fine tuned it, I made a master copy on tougher paper and used the light table to mark the quilt.
I'm rather pleased with how the corner turned out which is very much like the antique quilt
Now I get to baste the muslin to the back and start the stitching. It's going to be a long journey.

The fourth panel for the Trailing Vines quilt is available for download, just click on the Trailing Vines page at the top of my blog to access it. While I was doing the drawing, I noticed a  leaf  missing off the quilt  so as soon as I stitch that on, I'll add some photos to flickr.

Friday, March 9, 2012

I have a top

Remember this trapunto I was doing for the Coxcomb and Currants quilt? Well the good news is that all the blocks have been done so it was time to put the top together.
You have to excuse the not so great photo but you get the idea. I had a hard time getting it all sewn together.
I decided not to do the usual sized setting triangles with a separate border. I did it tough and made really over sized setting triangles to make the quilting design on the border easier with less seams to quilt through. I hope I don't ever have to do this again..
If I manage to get some time over the next few days, I'll be drawing the trapunto border which will mimic the trapunto in the alternate blocks. Lots to do yet but it's progress and I'm loving how it's looking so far.


Wednesday, February 22, 2012

It's been awhile

I had a great three weeks in New Zealand visiting family and I arrived back in Australia last weekend but it seems I never left apart from trying to get back into some sort of routine.
Indulge me while I drag out some Nana brag photos.

Here are the three youngest grandkiddos, I don't think the twelve year old would appreciate a photo on my blog. The girls are wearing the dresses I made for them and they fit perfectly. Sophie on the left is six and wants to grow her hair like Rapunzel on Tangled. Ella is our polly pocket rocket, she wants her hair long but it just won't grow! She helped me make bread and is very good at shaping balls of dough so she's the little baker. Noah is two now and is just mad about anything to do with the movie cars.
Being the youngest of four kids means Noah watches everything and then copies so when I was taking a photo of the stick insect, he raced to find the toy camera and copied my close up style, lol.
The weather was fabulous, not too hot and not cool except for at night so we did get to go to the beach which is not far away and dig for pipis. I suppose the taste would be like clams and we even got a few cockles.
When you dig for pipis that are not far into the ocean and when the tide is going in, you have to  twist  your toes to feel them under the sand, it's quite a sight and good exercise.
We soaked them overnight in sea water for them to spit out the sand and my DD made some delicious pipi fritters for dinner the next evening. It took me right back to my childhood with every summer at the beach doing the same thing.
My older sister and I had a couple of nice lunches out together and both of us chose a beef and pear salad with blue cheese dressing for lunch on one of those days. It was so delicious that I had to try and make it at home. It turned out to be really delicious but I could have added a few cherry tomatoes and it would have been perfect. I served it with my sourdough which I've missed so much while away.
It has salad greens, red onion, avocado, red capiscum, avocado, pear and roasted pine nuts along with the beef.
The dressing was so delicious that I just have to share. After it's been in the fridge, it goes thicker and would make a rock star dip.

Blue cheese dressing

  • 75g Costello blue cheese, chopped

  • 125g (1/2 cup) creme fraiche

  • 1 green shallot, end trimmed, thinly sliced

  • 1 garlic clove, crushed

  • 1 tbs white wine vinegar

  • 1 tbs light olive oil

  • 1 tbs good-quality whole-egg mayonnaise

  • 2 tsp Dijon mustard

  • Salt & freshly ground black pepper


  • To make the blue cheese dressing, place the blue cheese, creme fraiche, green shallot, garlic, vinegar, oil, mayonnaise and mustard in the bowl of a food processor and process until mixture is almost smooth. You can also use a mixing wand.Taste and season with salt and pepper. Transfer to a bowl or jug. Serve at room temperature. Cover with plastic wrap and store in the fridge until required. It will keep for several days.

    So what about the sewing? Well there wasn't too much of that but I did prep all my leaves for another panel on the Trailing Vines quilt before I left and I only have a few more leaves to sew on.
    I don't think anybody is in a rush for the next panel to download so when I've drawn it up, I'll let you know here on the blog.
    I did stuff another trapunto block for the Coxscomb quilt, each block takes me about four or five evenings to do so it's not a quick job.
    You get the idea of what it will look like from the back view without the yellow pen I used. I was too lazy to iron it so it might look a bit rough. The only thing I didn't get to work on was the snowball quilt from my last post but better to have too much than not enough sewing to do.
    I tried to keep up on my blog reading while I was away even if I didn't have time to leave comments.
    I'm looking forward to catching up. I do have a couple of Coxcomb and Currant blocks to email to some of you so that requested it so if you don't recieve them within a day or two, could you flick me another request please.
    Until next time, Janet

    Thursday, December 29, 2011

    Stitching and stuffing

    I had a terrific Christmas and I hope you all did too. I must come back and show you the books that I got from Santa, he's the best!
    I love the week between Christmas and New Year because I get to relax and enjoy my stitching again while the house is still reasonably clean and tidy. I get to dream about what I can tackle in the coming year and set some goals which usually last only a month.

    You may remember this drawing I did. It's for the hand quilting and trapunto on the Coxcomb and Currants project.
    This is my second try at tackling the stuffing of the shapes before the quilt gets put together and no, I haven't finished all the applique yet. I'm pleased to say that this time, I had a lot more success than the first go where I slit the muslin and stuffed the shapes and got distortion on the circles. It looked yuk.
    I'm using a different method to the one in my tutorial. This time, I drew the design on the front of the background. I layered and basted some fine cotton muslin on the back of the block and thread basted the two layers together.

    I then proceeded to baste all around the drawn design using a neutral coloured thread and stitches a little larger than my hand quilting stitches. I stitched inside the lines. I then stuffed the shapes from the back with yarn and a trapunto needle. Just in case curious minds want to know, it took me four evenings in front of the telly to get to this stage. The excess muslin has been cut away and the block pressed on several layers of a towel.
    The photo below isn't showing the colours accurately but you can get an idea of what it looks like so far with the blocks.
    Ignore all the yellow pen, that will all be gone at the end when the quilt is finished. You can read about the pens I'm using here that have been tested by moi.
    In the antique quilt, the stems aren't corded but I decided to go ahead as it just looked more pleasing to me
    Happy New Year to you all, lets hope the year brings us all good health and happiness. See you in 2012!

    Saturday, March 26, 2011

    Trapunto by hand

    I'm aware of two main methods of adding trapunto to hand quilting. Since most of my quilt is already quilted, I've been left with just one option which I'll try to explaining here step by step. This is my first try at it and I'm no expert but I found it relatively easy to do. All the photos can be clicked on for enlargement.
    • I'm using an acrylic bulky yarn that is very soft and doesn't have a tightly twisted ply. You can use wool but it must be washable and preshrunk. Matilda's Own had one for trapunto that they discontinued several months ago.
    • A six inch trapunto needle. I do know that Clover, Bohin, John James and Birch all make them.
    • A shorter tapestry needle can be helpful for small shapes.
    • Small sharp pair of scissors.
    • Rubber finger to help pull the needle through.
    • A toothpick.
    This yarn is very soft and doesn't feel like nylon at all. I like that the plies can be separated if needed.
    Double over the yarn and thread the needle through the eye. I'm using doubled yarn so I make the tail ends even.
    Because the tip of the needle is blunt, it won't damage the threads, it will separate them. A sharp pointed needle would damage the fabric threads and that's not what we want. I'm glad I used a plain muslin fabric on the back, it would be harder to see the quilted shapes otherwise.
    You can work the stuffing with or without a hoop. I like to do without since I can hide the thread ends easier later.
    Wiggle the tip of the needle into the shape to be stuffed on the back side of the quilt. In this case, it's a feather shape. I'm holding the quilt sandwich in my left hand like a sock puppet. The needle goes between the fabric and batting, not underneth the batting or in it.
    The needle exits at the bottom of the teardrop shape. It doesn't seem to matter if I start at the top or bottom of the shape.
    Pull the needle and yarn through, you'll need to tug a little.
    I leave about 1/8" tail at the entry hole, sometimes a bit less.
    I like to put my finger behind the thread at the exit end so that I'll be more in control of cutting the yarn. About an 1/8" is good. I make this cut very deliberate and slow so as not to have an accidental cut into the quilt. I've found that I can cut quite close after a bit of practice. Caution is paramount though.
    If I stretch the quilt sandwich like so, the thread ends often disappear inside the shape.
    Another option is to take a sharp needle and insert and twist around the yarn inside to get it to go inside the shape.
    Or you can use the toothpick to poke the ends in the holes.
    If you lightly scratch the warp and weft threads around the holes in the direction of the straight of grain, the holes will almost close up. I use the toothpick or a sharp needle. After washing, the threads around the entry and exit holes will close and tighten up further and there will be no evidence of how the stuffing got in there.
    After doing what I described above, you can hardly see the gaps. Cotinue adding the yarn until the shape is stuffed sufficiently.
    I'd hate to tell you in what order to stuff the shapes as I've found what suits me depending on the size. You could start in the middle and alternate side to side or you could start at one side and go from one side to the other.

    You may need to stagger some yarn so that you stuff more plies at the fat end of the shapes. Do that by adding yarn from the fat end to about the middle or two thirds of the way down.
    You know you've overstuffed if the quilting stitches on the right side look wrinkled. Stuff enough to give a full look but not too tightly that there's no give in the fabric. Check on the right side of the quilt.
    Here's how it's looking so far. I still have more to do on the bottom left ring.
    See, it's not hard but it does take time and it can be hard on the hand pulling the yarn through.
    For cording or stuffing narrow lines, I would assess how many plies it would take and the process is exactly the same. If the channel is narrow, try a smaller tapestry needle.
    You can click on this link here to a very helpful video which shows the steps as I've tried to explain them.It shows French boutis but it's the same method only without the batting in the middle.