Monday, May 10, 2010

My applique tips

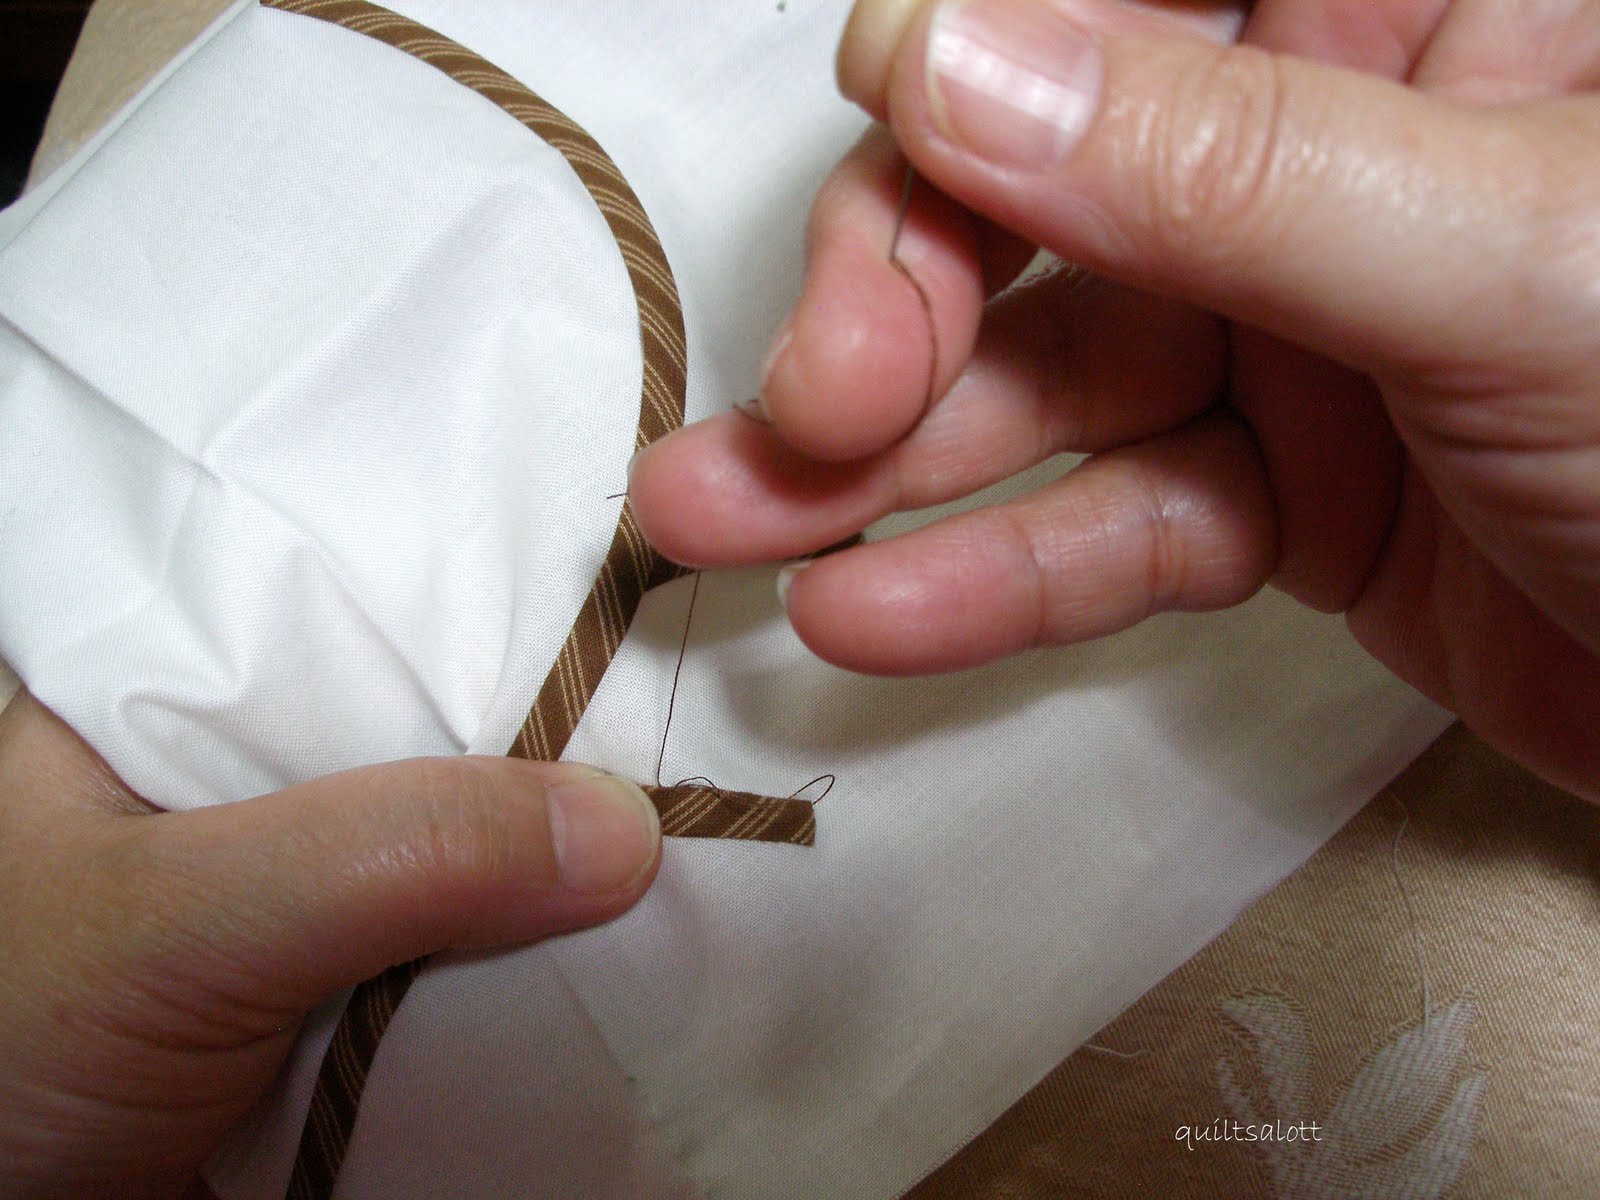
Tip #1 The invisible stitch.

I keep control over my stitching by holding my work between my thumb and forefinger close to my stitching.
The tip of the needle slides down and slightly under the seam allowance.
The stitch is taken behind the thread that has just come through. This is to make sure the stitch you take next  is perpendicular to the stitch already taken. The needle goes through at an angle and if you take the stitch in front or opposite the thread, the stitches will end up being angled and you don't want that.
As the stitch is taken, I use my left hand to fold down the work and bring my needle up. This will ensure that you are catching the background fabric and makes the stitch easier to take. Pick up a couple of threads in the seam allowance, not on the top of the applique piece. Practice and it will become natural after awhile.
Not every stitch I take is hidden but doing it this way has improved the look of my applique over time.,
Tip #2 Controlling the tension.

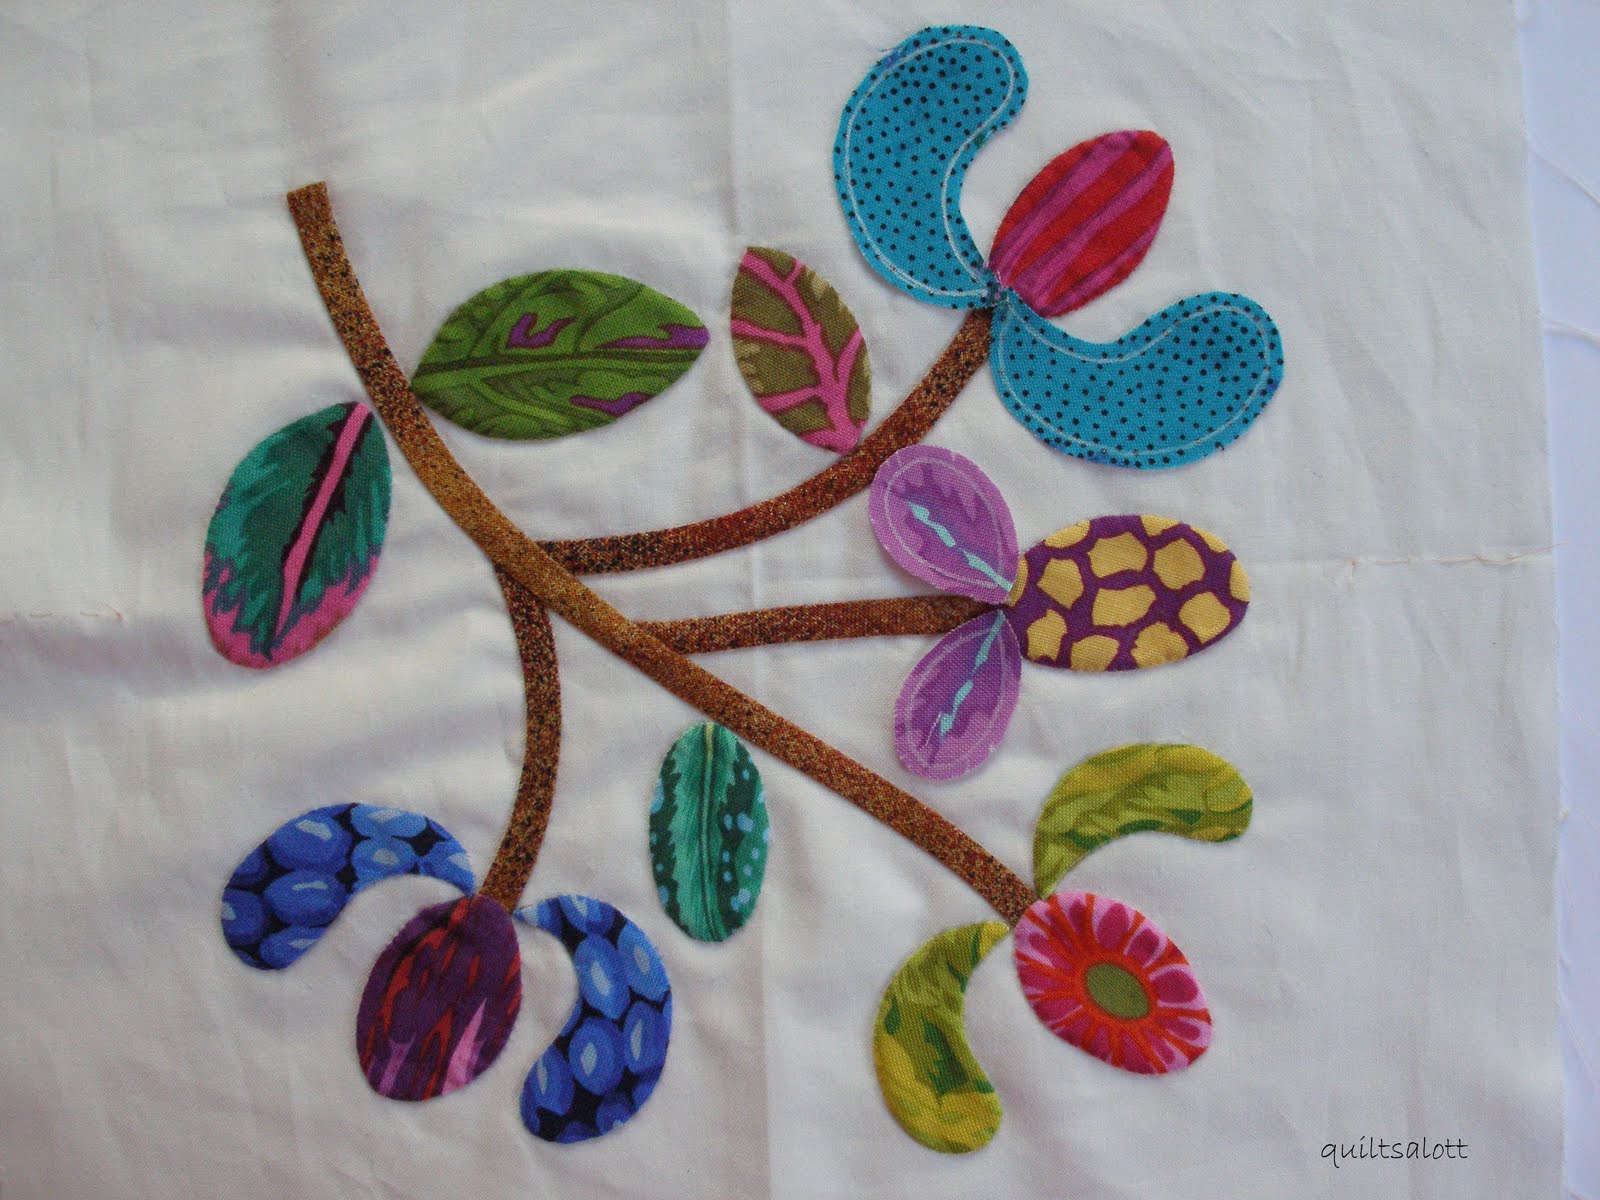
Remember my puckered work around the stems? I had been pulling the thread too tight so I've fixed that problem now by paying attention when sewing on bias stems. I like to glue baste the stems in place and it's important not to stretch it when you are positioning them.
As I pull through  the thread for each stitch, my last two fingers are placed so that the thread wraps over them. This controls how tight I can pull the thread. With a bit of practice, you can get into a rhythym. You don't want the stitch to distort the applique but on the other hand you don't want the stitch too loose and popping up.

Tip #3

I like to use cotton thread but some like the YLI silk thread for applique. The silk is hard to keep in the eye of the needle because it's so fine and slippery.
Here's one way to secure the thread. Thread the needle and place the tail end between the thumb and finger. Grip it tightly. Push the sharp end of the needle through the thread to pierce it. Pull the needle all the way through and you should have it secured at the eye.
The second way is to wrap the tail end over your thumb or finger and pierce the thread with the tip of the needle. Pull the needle through.
In both cases, this is what it will look like before you pull the needle through.
I always cut my background larger than required because there will be some distortion. Don't judge your applique until it's pressed. I press on the wrong side with a folded towel underneath before trimming the block.
I hope these tips are useful to some of you. I don't consider myself as all knowing when it comes to applique. I consider it an ongoing learning experience and am always looking to improve.

Thursday, May 6, 2010

More of the same.

I've not been myself, I've had sinusitis for two months which I thought was allergies. After a dose of antibiotics, I got better. Then we ran out of coffee, real coffee and I've been drinking the only pods we had left which were decaffeinated. Disaster! Headaches happened and in desperation, I bought coffee. At the counter there was a sign which said 1/4 strength capuccino available. What the heck is that? Why don't they call that a "don't bother coffee"? Today, the coffee arrived and I'm ready to bounce off the walls! Happiness reigns at my house once again.
I ordered two more thimble kits from Ma Mercerie in Japan that are bigger than the last one I made. I do believe my stitching is improving.
The last one I made is tiny in comparison and I think I like the bigger size. My poor eyes are surely going to thank me. Everything is bigger including the silk thread. They take me an evening to make.
This is the other kit I bought, the pincushion insert is made of wool felt and is included but there are no instructions so if you want to have a go and order something, get the starter thimble kit which has photo instructions. I want to get going on these, I'm enamoured with them and want to learn some new patterns.
I've been getting on with my applique and  I wanted to show you this block and it's big flaw. Can you see it? Well, let me just point it out in case you don't. Take a look at the background fabric behind the stems, see the puckering? Ugly, ugly, ugly but I'm not changing anything. It'll quilt out, I hope. It will won't it?
Now check out this one, as yet unfinished and not ironed. See, no puckering. I am constantly learning with applique. The problem is with the tension when stitching and the fact that I wasn't paying attention.
I have learnt a technique to control this and I'll see if I can get Mr Quiltsalott to take some photos and show you next time.

Saturday, May 1, 2010

Quilting with blinkers on

I've decided to knuckle down with just a few projects at a time in the hopes that I can work faster towards an elusive finish line. I have my blinkers on and I'm not going to listen to tempting thoughts on quilt alongs, blocks of the month or the myriad of projects in the sewing room that deafen me with their calls of pick me, pick me.

First thing I decided was which project was the one that I was going to love working on the very most and the Stars and Sprigs won in the applique section. Great choice because now I have the third row of nine done.

I've been trying to make use of my Kaffe scrap box for applique pieces, I love digging around in it and finding just the right piece. The only pieces I would throw out would have be tiny.
And I have to tell you about some exciting purchases that have come in the last week. I plan to make some more of the thimble rings I posted about last time so ordered these Japanese silk threads, love the box!
Love the colours!
Beautiful Ikats from Glorious Color
Stunning shot cottons also from Glorious Color, better than a box of crayons. Now you know why I'm on a silly budget. I do have plans for some additons to complement these fabrics but they'll have to wait.
I thought I'd just try and post an applique tip now and again for those who might be interested. It might provide a little insight in how I tackle things.

First up, invisible stitches.
I don't take my stitch in the background directly across from where the thread comes out., I think that the stitch would show. Instead, I insert the tip of needle into the background behind the thread just stitched and slightly under the seam allowance.

When I come up into the applique piece again, I aim to come up at the bottom of the seam allowance, not into the applique. So aim for the seam allowance and see if that makes a difference to the stitches. When I take that stitch, I'm only picking up two or three threads on the needle.

For the following photos, you can click on them to get an even closer look. Often with the Kaffe Fassett fabrics, thay have more than just one colour, I choose thread to match the dominant colour or go for a tan or grey thread. I love to use Mettler cotton, 60 weight embroidery thread.
For this one, I chose a gold.
This one was stitched with a tan thread.
I'll see you next time with an update on how I'm going. Until then, happy stitching!

Sunday, April 25, 2010

Little finishes

When I was young, my mother told me not to start any new projects until I had finished what I had started. I think it stifles me to do that now and my abilities wouldn't grow without tryng new things.
However, the time comes when I really need to finish the annoying little things hanging around like this yarn bag I started last year. It didn't take long, I only had one handle and some flowers and leaves to do. I love it and now I have a special yarn project bag. The pattern is from Attic 24, be warned, once you start looking around, your fingers will start itching to crochet something colourful.
It hold so much and it's squishy and soft.
My other little finish was the pincushion kit I got from Ma Mercerie. I love how it turned out but I have to say when I looked at the macro photo, I can see areas for improvement, just little ones. My tension is a lot better than on the thimble ring I did. I found a lot of information on Ma Mercerie and on Temari Train that helped a lot.

For those who asked how the thimble is used, go to this post. 
After being a slacker last week, I did get to make 28 klosjes this week,
Please don't mind the ones turned the wrong way.
I have them stored by colour so I can see which piles need more. I think I'll start assembling soon. Total now is 129.
Just a little tidbit to finish off because I have to get ready, I'm off to a one year olds 1st birthday party.

I recieved a lovely gracious email from Rannveig about my little purse tutorial being the same as hers. Click here to see hers. It's purely coincidental as can happen and I applaud bloggers who keep an eye on these things.
Her one has the same shape and size and the zip is machine sewn in whereas mine is hand sewn. Her pattern is from a purse she had bought I think and mine came from a Japanese book but with changes made. I'll add a little note about this on the tutorial as soon as I have time. It's a very common purse and there are a lot of patterns out there the same or similar as we now realise.

Wednesday, April 21, 2010

A pause from quilting, I've been sidetracked.

What a mail week I've had, remember this toile I fell in love with? Cathy from Cabbage Quilts sent a wonderful RAK to me. I adore it and she sent some favourite chocolates and a beautiful wee card. How lucky can a quilter get?
And then I nearly had a tear in my eye because she sent me this fabric. I remember seeing it a very long time ago but it was too late, it was all gone. What a special treasure. Bloggers are among the most sharing and generous, and inspirational  people and Cathy sure is one of them, thank you heaps my  friend!
When I went shopping last, I picked up some Japanese products. I've been wanting these leather thimbles for my hand piecing of the klosje blocks. You wear them on the first knuckle of the middle finger to hold the eye of the needle while you do the running stitch.
After I paid for my goodies, I spied these cuties in a cabinet, they're going to be great for zipper pulls. Actually, do they look a bit South Park to you? I'll call them babies in hooded jackets thank you!
And that's not all, there's more I wanted to share with you. Do I sound like an infomercial? Oh sorry but I'm a bit excited about the next lot of stuff.

I'm channelling the half of me that's Japanese I think. Darn shame my mother never taught us all the language , then I'd be able to read, I could have been an interpreter, I would have loved that. Imagine working with Japanese quilters, sigh.

Anyhow, I got mail from Japan, I might not be able to read or write it but I sure know how to order it on the internet. ( now I have to go on a silly budget)
The book on the right is a pattern book for making Kubinuki, translated it means Japanese thimble.
Here's a photo from the book which shows what looks to be some antique thimbles. These were made from paper, silk padding and fabric. The author's Grandmother (or mother, don't know which but she looked like Grandmother) taught her the art to pass it on. They were used to hand sew the silk Kimono because the metal or leather thimbles were too wearing and damaging for the delicate silk.
They reminded me of Temari in their intricate stitching designs.
Step by step photos and diagrams mean that I can understand what the method is.
So being the sort of person that sees something gorgeous that involves needles and thread, I have to have a go. That's how I started with quilting, Hardanger embroidery, Temari etc. I think I'm stitching my way around the world with my needle. I ordered this kit from Chloe Patricia of Ma Mercierie. It was only $US8 so I bought two. I have to justify the postage you know.

You get the instructions along with the base already made up with two rows of stitching done for you and then you just carry on.
So here it is, my very first Japanese silk thimble stitched with very fine silk thread. Not too shabby for a first timer. I can see the pitfalls, the room for improvement but I loved doing it.
Here's the second kit I bought which is a more intricate design, I can understand how to do  it even though there are no instructions with this one. This is all that's included in the kit. The silk thread is very fine. The black wool felt form is to insert  to make it into a mini pincushion. I'll let you know how it goes.
As you can imagine, there's not a lot of quilting going on while I just satisfy this need to embroider.